
# Photo Editing Tutorial for Complete Beginners
Have you ever taken a photo that looked great on your camera but appeared too dark, blurry, or dull when you opened it on your computer? Maybe the colors looked different from what you saw in person, or there was something distracting in the background. These are common problems, especially when you are just getting started with photography.
The good news is that you do not need to be a professional photographer or graphic designer to improve your photos. With a few basic photo editing techniques and the right tools, you can make ordinary pictures look cleaner, more balanced, and more professional.
Photo editing is not always about making major changes. Sometimes, adjusting the brightness, correcting colors, or cropping an image is enough to make a noticeable difference.
In this **photo editing tutorial for complete beginners**, you will learn what photo editing is, why it matters, which tools you can use, and how to edit photos step by step. You will also discover common beginner mistakes and practical tips that can help you develop your editing skills.
Whether you want to improve personal photos, prepare product images for your online store, or explore photo editing as a career, this guide will help you get started.
What Is Photo Editing?
Photo editing is the process of adjusting or modifying a digital image to improve its appearance, correct problems, or prepare it for a specific purpose.
A photo straight from the camera may not always look the way you expected. Lighting conditions, camera settings, movement, and background distractions can affect the final image.
Photo editing allows you to correct many of these issues after taking the picture.
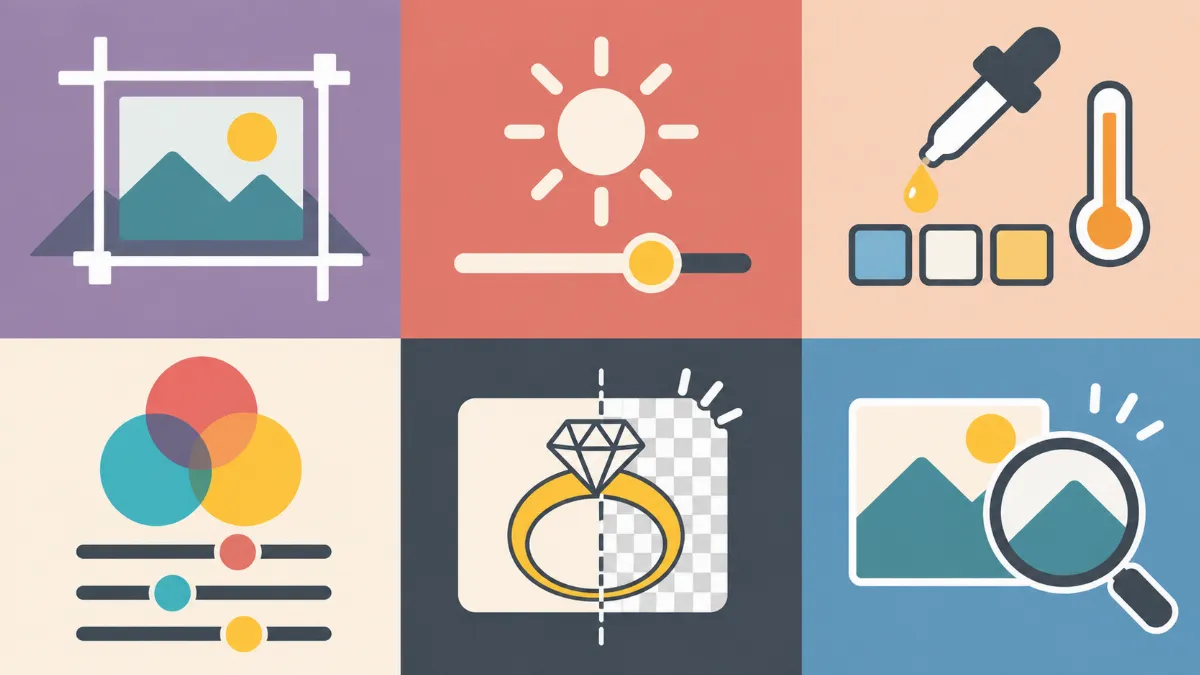
Some common photo editing tasks include:
- **Brightness adjustment:** Making an image lighter or darker.
- **Color correction:** Adjusting colors so they appear more natural and balanced.
- **Cropping:** Removing unnecessary areas and improving image composition.
- **Background removal:** Separating the main subject from the background.
- **Sharpening:** Improving the appearance of edges and fine details.
- **Spot removal:** Removing dust, small marks, or distracting objects.
- **Contrast adjustment:** Changing the difference between lighter and darker areas.
For example, imagine photographing a diamond ring for an online jewelry store. The original photo might have a slightly gray background, dark reflections, and colors that do not accurately represent the ring.
Using photo editing software, you can correct the background, adjust the metal color, reduce distracting reflections, and improve the visibility of the gemstone.
The goal is to present the jewelry clearly while keeping its real design, proportions, and details accurate.
Why Do You Need to Learn Photo Editing?
Learning photo editing is useful because almost every digital platform relies on visual content.
From social media and personal websites to online shopping and advertising, photographs play an important role in how people communicate and present information.
Here are several reasons why learning basic photo editing skills can be beneficial.
1. Improve the Quality of Your Photos
Not every picture comes out perfectly.
Sometimes, the lighting is uneven, the background is distracting, or the subject looks too dark. Learning basic editing techniques helps you correct these problems without taking another photo.
A simple adjustment to exposure or white balance can make an image look more natural.
2. Make Your Social Media Content More Consistent
If you regularly post photos on Instagram, Facebook, TikTok, or Pinterest, editing can help maintain a consistent appearance.
Using similar color settings, cropping styles, and image proportions can make your posts feel more connected.
You do not need complicated effects. Clean, balanced photos often work better than images with excessive filters.
3. Prepare Better Product Photos
For online sellers, product photography directly affects how customers view their products.
Customers cannot physically inspect an item before buying it online, so photographs provide important visual information.
Editing helps improve background cleanliness, lighting balance, and product visibility.
For clothing, jewelry, cosmetics, and accessories, accurate colors and clear details are especially important.
4. Save Money on Simple Editing Tasks
Learning the basics allows you to complete everyday editing tasks yourself.
You can crop images, adjust exposure, resize photos, and remove minor distractions without hiring someone for every small change.
However, complicated projects such as advanced jewelry retouching, detailed product masking, and large commercial editing batches may still benefit from experienced editors.
5. Develop a Useful Creative Skill
Photo editing can also become a valuable skill for freelance work, online businesses, digital marketing, and content creation.
As you become more comfortable with editing software, you can gradually explore advanced techniques such as layer masking, object removal, compositing, and professional retouching.
What Do You Need Before You Start Editing Photos?
Before learning the editing process, prepare a few basic things.
You do not need an expensive computer or professional editing equipment to begin.
A Computer or Smartphone
You can edit photos using a desktop computer, laptop, tablet, or smartphone.
A computer is generally more comfortable for detailed tasks because it offers a larger screen and precise mouse or drawing-tablet controls.
Smartphones are convenient for quick adjustments and social media editing.
Photo Editing Software
Choose an editing application that matches your current skill level.
Beginners may find simple software easier to learn before moving into more advanced applications.
Many editing programs offer basic adjustments such as brightness, contrast, cropping, saturation, and sharpness.
A Practice Photo
Select a clear photograph to practice with.
A portrait, landscape, food photograph, or product image can work well.
For your first attempt, choose an image that needs only minor improvements rather than extensive repairs.
A Backup of the Original Image
Always keep the original photograph.
Saving a separate editing copy allows you to experiment without permanently losing the original file.
This is especially important when working with client photos or valuable personal images.
Best Photo Editing Software for Complete Beginners
There are many photo editing tools available today, but you only need one or two to begin practicing.
Here are some popular options.
Adobe Photoshop
Adobe Photoshop is widely used for professional photo editing and digital image manipulation.
It offers tools for retouching, background removal, color adjustments, masking, and working with multiple image layers.
Photoshop may appear complicated at first, but beginners can start with basic functions such as cropping, adjustment layers, and spot removal.
Once you become familiar with the interface, you can gradually learn more advanced editing techniques.
Adobe Lightroom
Adobe Lightroom focuses primarily on photographic adjustments and photo organization.
It is useful for adjusting exposure, contrast, highlights, shadows, white balance, and color.
Lightroom is a practical choice for beginners who want to improve multiple photos while maintaining a consistent editing style.
Canva
Canva offers a simple editing interface that works well for basic image adjustments and content design.
You can crop images, apply filters, adjust colors, and prepare visuals for social media posts.
It is especially helpful for beginners who want to combine photography with simple graphic design.
Some features require a paid plan.
GIMP
GIMP is a free, open-source image editing program.
It supports layers, selections, color adjustments, masks, and retouching tools.
Although its interface requires some practice, GIMP is worth considering if you want to learn more detailed image editing without paying for a software subscription.
Snapseed
Snapseed is a mobile photo editing application with tools for exposure adjustment, cropping, color correction, and selective editing.
It is useful for beginners who prefer editing photos directly on their smartphones.
**Beginner tip:** Start with the software you already have access to. Learning the principles of editing matters more than buying an expensive application.
Step-by-Step Photo Editing Tutorial for Beginners
Now that you understand the basics, it is time to edit your first photograph.
The following steps work with many popular photo editing applications, although individual tool names and settings may differ.
Step 1: Open Your Photo in the Editing Software
Start by opening your chosen editing application.
Locate the option to import or open an image and select the photograph you want to edit.
Before making changes, examine the picture carefully.
Ask yourself:
- Is the image too dark or too light?
- Do the colors appear natural?
- Is the subject clearly visible?
- Are there distracting objects in the background?
- Does the composition need improvement?
Identifying the problems first will help you avoid making unnecessary adjustments.
It is also a good idea to duplicate the image or create a working copy before editing.
Step 2: Crop and Straighten the Image
Cropping is one of the easiest ways to improve a photograph.
The crop tool allows you to remove unnecessary portions of an image and focus attention on the main subject.
For example, a product photograph may contain too much empty space around the item. Cropping the image can make the product more visible.
You can also straighten photographs that appear tilted.
When cropping, consider the final purpose of the photo.
A square image may work for an online product catalog, while a vertical image may be more appropriate for certain social media posts.
Avoid cropping too tightly because it can remove important details or make the photograph feel crowded.
If you are editing a product image, check the required dimensions and maintain the correct proportions.
Step 3: Adjust the Brightness and Exposure
Brightness and exposure adjustments help control how light or dark a photograph appears.
If your photo looks too dark, gradually increase the exposure until the subject becomes easier to see.
If the image appears too light, reduce the exposure.
Try to maintain detail in both the lighter and darker parts of the image.
Excessive brightness can make white areas lose detail, while too little exposure can hide important textures in shadows.
For a beginner, small changes are usually more effective than dramatic adjustments.
Compare your edited photo with the original to check if the lighting still appears natural.
Step 4: Correct the Contrast
Contrast refers to the difference between the light and dark areas in a photograph.
Increasing contrast can make certain details appear more defined. Decreasing contrast can create a softer appearance.
For example, a landscape image with low contrast may appear flat, while a moderate contrast adjustment can make the mountains and sky more distinct.
However, too much contrast can create harsh shadows and remove details from darker areas.
Start with a small adjustment and examine the result.
The ideal contrast depends on the subject, lighting conditions, and intended appearance.
Step 5: Adjust Highlights and Shadows
Highlights are the lighter areas of an image, while shadows are the darker areas.
These adjustments are useful when a photograph contains both very bright and dark sections.
For example, imagine photographing a person outdoors on a sunny day.
The sky may appear very bright while the person's face is darker.
Reducing highlights may recover visible detail in the sky, provided the original image contains that information.
Increasing shadows can make darker areas easier to see.
Be careful not to brighten shadows excessively because this can introduce noise and make the picture look unnatural.
Adjust both settings gradually to maintain a balanced result.
Step 6: Fix the White Balance
White balance controls how warm or cool the colors appear in a photograph.
Sometimes, photographs taken indoors appear too yellow because of artificial lighting.
Other images may look too blue, especially under cool lighting conditions.
Most photo editing software provides temperature and tint controls for correcting these color differences.
Temperature generally adjusts the image between warmer yellow-orange tones and cooler blue tones.
Tint usually adjusts the balance between green and magenta.
For product photography, accurate white balance is particularly important.
A white shirt should appear white, and a yellow-gold ring should retain its actual metal color.
Avoid making color changes that misrepresent the original product.
Step 7: Adjust Saturation and Vibrance
Saturation controls the intensity of colors in a photograph.
Increasing saturation makes colors appear stronger, while reducing it makes them more muted.
Vibrance is another common setting that adjusts color intensity more selectively, depending on the software.
For beginners, it is tempting to increase these settings significantly.
However, excessive saturation can make skin tones appear orange, grass unnaturally green, and product colors inaccurate.
Use small adjustments and focus on maintaining realistic colors.
For commercial product images, color accuracy should be a priority over dramatic visual effects.
Step 8: Remove Small Spots and Distractions
Some photographs contain unwanted spots, dust marks, blemishes, or small background distractions.
Many editing applications include a healing, spot removal, or retouching tool.
These tools can help remove minor imperfections by blending nearby image information.
For example, you may want to remove a small dust spot from a product background.
Select the appropriate tool, adjust the brush size, and carefully apply it to the unwanted mark.
Zoom into the image to work more accurately.
Avoid removing real product characteristics or altering important details.
In jewelry photography, natural gemstone features, engravings, metal structure, and design elements should remain accurate.
Step 9: Sharpen Your Photo Carefully
Sharpening improves the appearance of fine details and edges.
This can help make product textures, facial features, or architectural elements appear more defined.
However, sharpening cannot always repair an image that is severely out of focus.
Too much sharpening can create unwanted halos, rough edges, and excessive texture.
Start with a low sharpening amount and increase it only when necessary.
For product photography, focus on important details such as fabric textures, jewelry edges, and surface finishes.
Check the image at approximately 100% zoom to evaluate the sharpening effect.
Remember that a natural-looking photograph is usually more useful than an overly processed one.
Step 10: Export and Save Your Edited Photo
Once you finish editing, save your work in the appropriate format.
The correct file type depends on how you plan to use the photograph.
**JPEG or JPG** is commonly used for websites, social media, and everyday photography because it offers relatively small file sizes.
**PNG** is useful when you need transparency or lossless image storage.
**TIFF** is often used in professional image workflows when high-quality image data must be preserved.
If your editing software supports a native project format, save that version as well.
Keeping an editable project file allows you to return to your work and make further changes.
Before exporting, check the image dimensions, color appearance, file size, and final quality.
Common Photo Editing Mistakes Beginners Should Avoid
Making mistakes is a normal part of learning photo editing.
However, recognizing common problems early can help you improve more quickly.
Editing Too Much
One of the most common beginner mistakes is applying excessive adjustments.
Increasing contrast, saturation, clarity, and sharpness all at once can make an image appear artificial.
Try making one adjustment at a time and compare the results with the original image.
Using Too Many Filters
Filters can be useful for developing a particular style, but using several strong filters together can create inconsistent colors.
Instead, focus on learning basic adjustments before experimenting with creative effects.
Ignoring Image Resolution
Low-resolution images may lose quality when enlarged or heavily cropped.
Always begin with the highest-quality original file available.
If you are preparing images for printing or online stores, check the required dimensions before editing.
Changing Product Colors
When editing commercial photographs, do not change a product's appearance in a misleading way.
For example, silver jewelry should not appear dark gray simply because excessive contrast was applied.
Clothing colors, gemstone shades, and product finishes should stay consistent with the actual item.
Forgetting to Save the Original
Editing directly over the only copy of a photograph can cause problems if you need to restore the original.
Save backups and use non-destructive editing features when available.
Adjustment layers, masks, and editable settings make it easier to reverse changes later.
Simple Photo Editing Tips to Improve Your Skills
Becoming more comfortable with photo editing takes consistent practice.
You do not need to learn every editing tool at once.
Start with a few techniques and gradually introduce new ones as your skills improve.
Practice With Different Types of Photos
Try editing portraits, landscapes, product photos, food images, and indoor photographs.
Each type of image presents different challenges.
Portrait editing may require careful skin-tone adjustments, while product photography often focuses on background cleanliness and accurate colors.
Practicing with different subjects helps you develop a broader set of skills.
Compare Before and After Images
One effective way to evaluate your editing is to compare the original photograph with the final result.
Look for improvements in lighting, colors, details, and composition.
Ask yourself if the edited photo looks natural and if the changes serve a clear purpose.
If you cannot explain why an adjustment was necessary, consider reducing or removing it.
Learn Keyboard Shortcuts
Many photo editing programs offer keyboard shortcuts for common tools and actions.
Learning a few shortcuts can help you work more comfortably.
Start with shortcuts for undo, zooming, saving, and switching between commonly used tools.
Understand Basic Color Theory
Color theory explains how colors relate to one another.
Learning about warm and cool tones, complementary colors, and color balance can help you make more informed editing decisions.
For beginners, start by recognizing when an image has an unwanted color cast and how to correct it.
Develop a Consistent Editing Process
Following the same basic order can make your work easier to manage.
For example, begin with cropping, then adjust exposure, correct white balance, refine colors, remove distractions, and apply final sharpening.
Having a repeatable workflow reduces unnecessary changes and helps maintain consistency across several images.
Can Beginners Learn Professional Photo Editing?
Yes. Anyone willing to practice can begin developing professional photo editing skills.
However, professional work involves more than knowing how to adjust brightness or apply filters.
Experienced editors often work with detailed selections, advanced masking, color management, complex retouching, and strict client requirements.
They also need to maintain consistent quality across many photographs.
For example, editing one product photo may be relatively simple, but preparing hundreds of product images with matching backgrounds, accurate colors, and consistent dimensions requires careful quality control.
If you are interested in pursuing photo editing professionally, begin by building confidence with fundamental tools.
As your skills improve, explore advanced subjects such as Photoshop layers, non-destructive retouching, image masking, batch processing, and color matching.
You can also create a small portfolio containing before-and-after examples to demonstrate your progress.
How Long Does It Take to Learn Photo Editing?
The time required to learn photo editing depends on your goals, available practice time, and the complexity of the techniques.
Many beginners can learn simple adjustments such as cropping, exposure correction, and saturation changes after a few practice sessions.
More advanced skills, including detailed portrait retouching or complex product editing, generally require much more practice.
Rather than focusing on how quickly you can learn, concentrate on improving your results.
A useful beginner practice schedule might look like this:
- **Week 1:** Learn cropping, exposure, contrast, and white balance.
- **Week 2:** Practice color correction, highlights, shadows, and basic sharpening.
- **Week 3:** Experiment with spot removal, selections, and simple background editing.
- **Week 4:** Edit complete images independently and compare your results.
This schedule is only a suggested learning plan. You can move faster or slower depending on your experience.
The goal is to become comfortable making editing decisions without relying entirely on automatic filters.
When Should You Hire a Professional Photo Editor?
Learning to edit photos yourself is useful, but some projects may require more advanced techniques or additional time.
For example, professional assistance may be helpful when you need:
- Detailed jewelry photo retouching.
- Complex background removal.
- High-volume e-commerce product editing.
- Accurate clothing and product color correction.
- Advanced portrait and beauty retouching.
- Consistent editing across hundreds of images.
- Complicated object removal and image cleanup.
Professional photo editing services can be useful for businesses that need consistent results while managing other responsibilities.
At **Photo Editing Company**, we work with different types of commercial photography, including jewelry, apparel, product, portrait, and real estate images.
For businesses handling large photo collections, outsourcing selected editing tasks can help reduce internal workloads while maintaining established editing requirements.
You can learn more about professional photo editing services at Photo Editing Company.
Frequently Asked Questions About Photo Editing for Beginners
Is Photo Editing Hard for Beginners?
Basic photo editing is relatively easy to learn with regular practice.
You can begin with simple adjustments such as cropping, brightness, and color correction before moving into more complicated tools.
The most important part is learning what each adjustment does and when to use it.
Can I Learn Photo Editing Without Photoshop?
Yes. Photoshop is not required to learn photo editing.
You can use applications such as GIMP, Canva, Lightroom, or Snapseed to practice many beginner techniques.
The editing principles you learn can often be applied across different software programs.
What Is the Easiest Photo Editing Technique to Learn?
Cropping and brightness adjustment are two of the easiest techniques for beginners.
They require relatively little technical knowledge and can make an immediate difference in how a photograph looks.
Can I Edit Photos Using Only My Smartphone?
Yes. Modern smartphones support many editing functions, including exposure adjustment, cropping, color correction, and spot removal.
Mobile editing is especially convenient for everyday photography and social media content.
More detailed editing projects may be easier to complete on a computer.
Should I Use Automatic Photo Editing Tools?
Automatic editing tools can be helpful for quick adjustments and learning how certain changes affect an image.
However, automatic results are not always accurate.
Review the final image and make manual corrections when necessary, especially when product colors and important details must remain unchanged.
What Is the Best Way to Practice Photo Editing?
Choose a few photographs and edit them using basic adjustment tools.
Save your original images, compare before-and-after versions, and repeat the process with different photographs.
Consistent practice will help you recognize which adjustments improve an image and which ones are unnecessary.
Final Thoughts
Learning photo editing does not have to be complicated or expensive.
You can begin with a smartphone, a simple editing application, and a few photographs that need improvement.
Start by learning how to crop images, correct brightness, adjust contrast, and balance colors. Once you are comfortable with these skills, gradually experiment with retouching, sharpening, background editing, and more advanced techniques.
Remember that good photo editing is not about changing everything in a picture. It is about identifying what needs improvement and making careful adjustments while preserving important details.
For beginners, patience and regular practice are more useful than complicated effects or expensive software.
If you are editing personal photographs, creating social media content, or preparing product images for your business, these basic techniques can help you achieve cleaner and more consistent results.
And when your projects require advanced retouching or large amounts of editing, working with experienced photo editors can be a practical option.
**Start with one photograph, practice the basic adjustments, and build your skills one edit at a time.**